Review of the “Project management” site template
Analysis of Microsoft’s “Project management” site template for SharePoint, tips on configuring and web parts, and the hidden page template for status reports
Using SharePoint site templates, site owners can add relevant lists, libraries, page content, notifications, and flows. Site templates help you get started faster with SharePoint Online in Microsoft 365. When creating a new team site, choose a Microsoft site template. You can also upload additional site templates. Since site templates are used like a script, you as a site owner can also apply a site template to an already existing site.
With the “Project management” site template from Microsoft, you add
- Progress tracker list (Project tracker list)
- Issue tracker list
- Microsoft 365 Group calendar link
- SharePoint list for project milestones
- Upgraded project management homepage
- Page template for project status reports
and more capabilities to your SharePoint team site in just one step.
However, you should only make one little correction as soon as you´ve applied the site template!
 Adapt SharePoint Template 'Project management'
Progress Tracker List
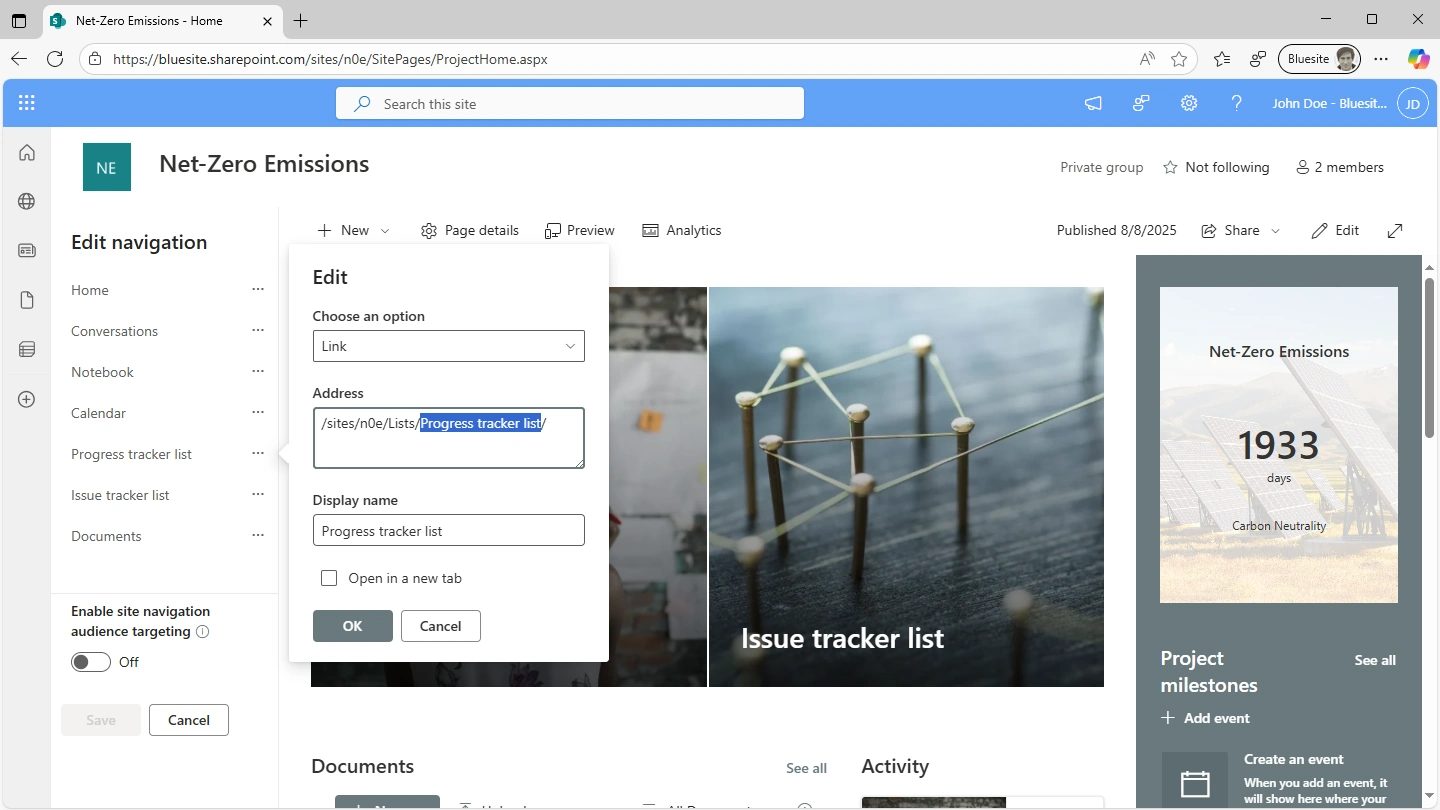
After applying the SharePoint “Project management” site template to a new or existing team site, you should correct the display name of the navigation link to the progress tracker list. The navigation link "Project tracker list" leads to "Progress tracker list". To do this, click on “Edit” below the navigation menu on the left side.
Tip: Open the progress tracker list at the top right by clicking ![]() Open in immersive mode
Open in immersive mode
The progress tracker (“Work tracker” list template from Microsoft) list includes the following columns:
| Name | Type | Additional Options |
|---|---|---|
| Work item | Single line of text, renamed title column | |
| Description | Multiple lines of text | Use enhanced rich text |
| Category | Choice (“Can add values manually” enabled) | Yes, allow multiple selections |
| Status | Choice (“Can add values manually” enabled) | |
| Priority | Choice (“Can add values manually” enabled) | |
| Start date | Date and time (user-friendly format) | |
| Due date | Date and time (user-friendly format) | |
| Assigned to | Person or group (show profile photos) | |
| Notes | Multiple lines of text | |
| Key project stakeholders | Person or group (show profile photos) | Yes, allow multiple selections |
These settings enable team members to add new values in the Category, Status, and Priority columns, while adding work items. I recommend disabling manual value entries for the Status and Priority columns to maintain consistency.
The folks who developed this site template enabled profile photos for the “Assigned to” and “Key project stakeholders” columns—it looks fantastic when project members upload good profile pictures to their M365 profiles. Maybe you should bring that up at a kick-off meeting.
Views of the progress tracker list:
| Name | Settings |
|---|---|
| All items | Default view, edit in grid view, sorted ascending by “Assigned to” |
| Grouped by priority | Auto row height, grouped by “Priority” column |
| My work items | Filter column “Assigned to” [Me], fixed row height, sorted ascending by “Assigned to” |
| Sorted by progress | Grouped by “Status” column |
It is convenient that the people at Microsoft have enabled grid view for all items—it makes it much faster to enter new work tasks. I can even paste a list of tasks from the clipboard!
Two notification rules are enabled for the progress tracker list:
- When the status is changed to “Completed,” the person in the “Key project stakeholders” column receives an email.
- When the “Priority” column is changed, the person in the “Assigned to” column receives an email.
In addition, a flow is configured for the progress tracker list. If you canceled out of the Power Automate dialog, you can complete setup by clicking ![]() Complete setup at the top right of the progress tracker list.
Complete setup at the top right of the progress tracker list.
The “Due date reminder” flow sends a reminder three days before the date in the “Due date” column to the person listed in the “Assigned to” column. In Power Automate under “My flows,” you’ll see the flow for the progress tracker list from the “Project Management” site template by Microsoft with the name “8d60c9f4-0836-4d5b-9a6e-7d3bccc04ee9 - Due date reminder.”
Issue Tracker List
The issue tracker list from the “Project management” site template by Microsoft includes 6 columns. Bye the way, you can add this list by using the “Issue tracker” list template from Microsoft to every SharePoint website. But the issue tracker list template from Microsoft isn´t up-to-date – you should apply a quick fix to enable colored choice labels (pills), like those used in the Status column.
| Name | Type | Additional Options |
|---|---|---|
| Title | Single line of text | |
| Issue description | Multiple lines of text | Use enhanced rich text |
| Priority | Choice | |
| Status | Choice (“Can add values manually” enabled) | |
| Assigned to | Person or group (show profile photos) | |
| Attached files | Attachments | |
| Related issue | Lookup from same list “Issue tracker list” column “Title” |
I suggest disabling manual input for the Status column, as with the progress tracker list.
I am not sure how the “Attached files” column was created, but it is unfortunate that the list only shows a paperclip to indicate there is an attachment. It would be great if the column included a link to instantly preview the file.
If users do not read the description for the “Related issue” column, they might not realize how it is intended to be used. This column lets you link two or more issues that are related to each other in the list, so connections between them become visible.
Views for the issue tracker list:
| Name | Settings |
|---|---|
| All items | Default view |
| My active issues | Filter column “Assigned to” [Me], column “Status” by New, Blocked, and In progress, and column “Created” sorted (most recent first) |
| Issue status | “Board” organized by “Status” column for the buckets |
| Created by me | Filter system column “Created by” [Me] |
Two notification rules are enabled for the issue tracker list:
- When a new issue is created, the person in the “Assigned to” column receives an email.
- When the person in the “Assigned to” column is changed, that person receives an email.
Quick fix for Microsoft’s Issue Tracker List Template
You need to apply the following quick fix to enable colored choice labels (pills), like those used in the Status column:
- Click on Priority column header
- Select Column settings, and click on Format this column
- Right edge, under Format Priority column,
below the editor field, click on link Switch to design mode - Confirm by clicking Switch
- At the bottom, click on Save
- At the bottom, click on Close
Navigation link to the group calendar
With the “Project Management” site template from Microsoft, you add a navigation link to the group calendar of the Microsoft 365 group for your team site. Do not confuse the group calendar with the SharePoint event list for project milestones! Events from the group calendar appear for members in their personal Outlook calendar.
Homepage of the Project Management site
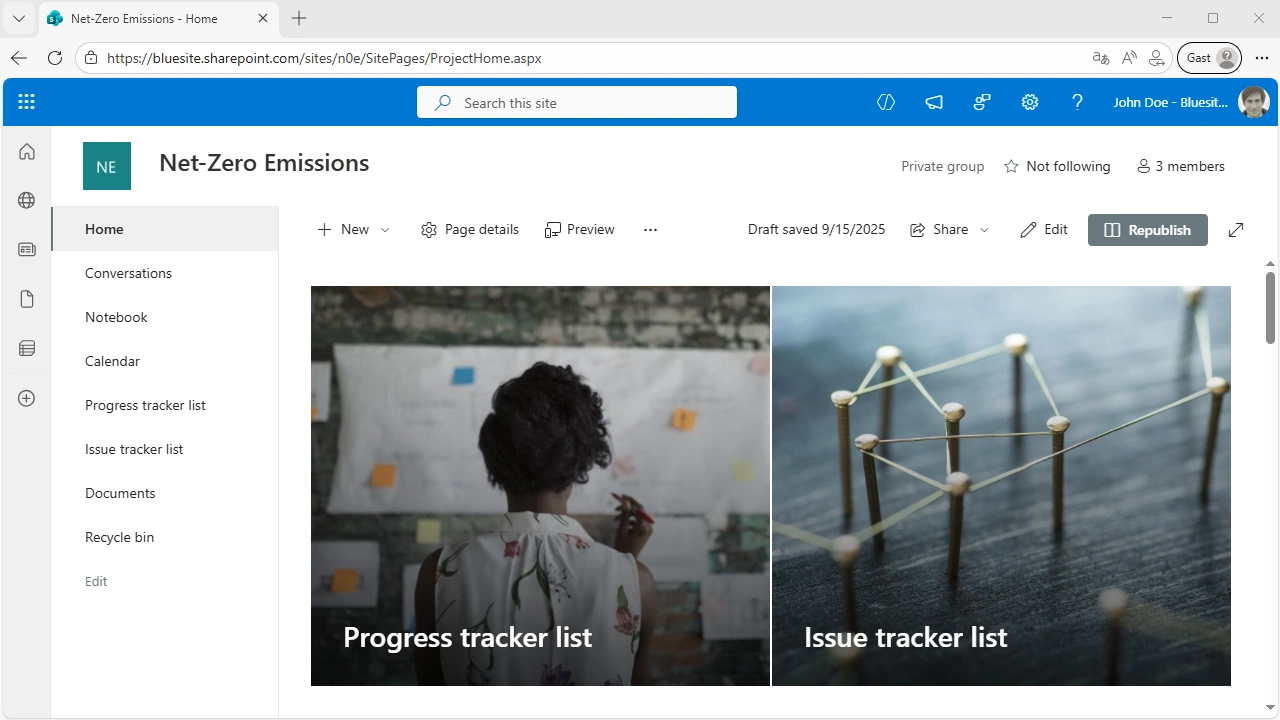
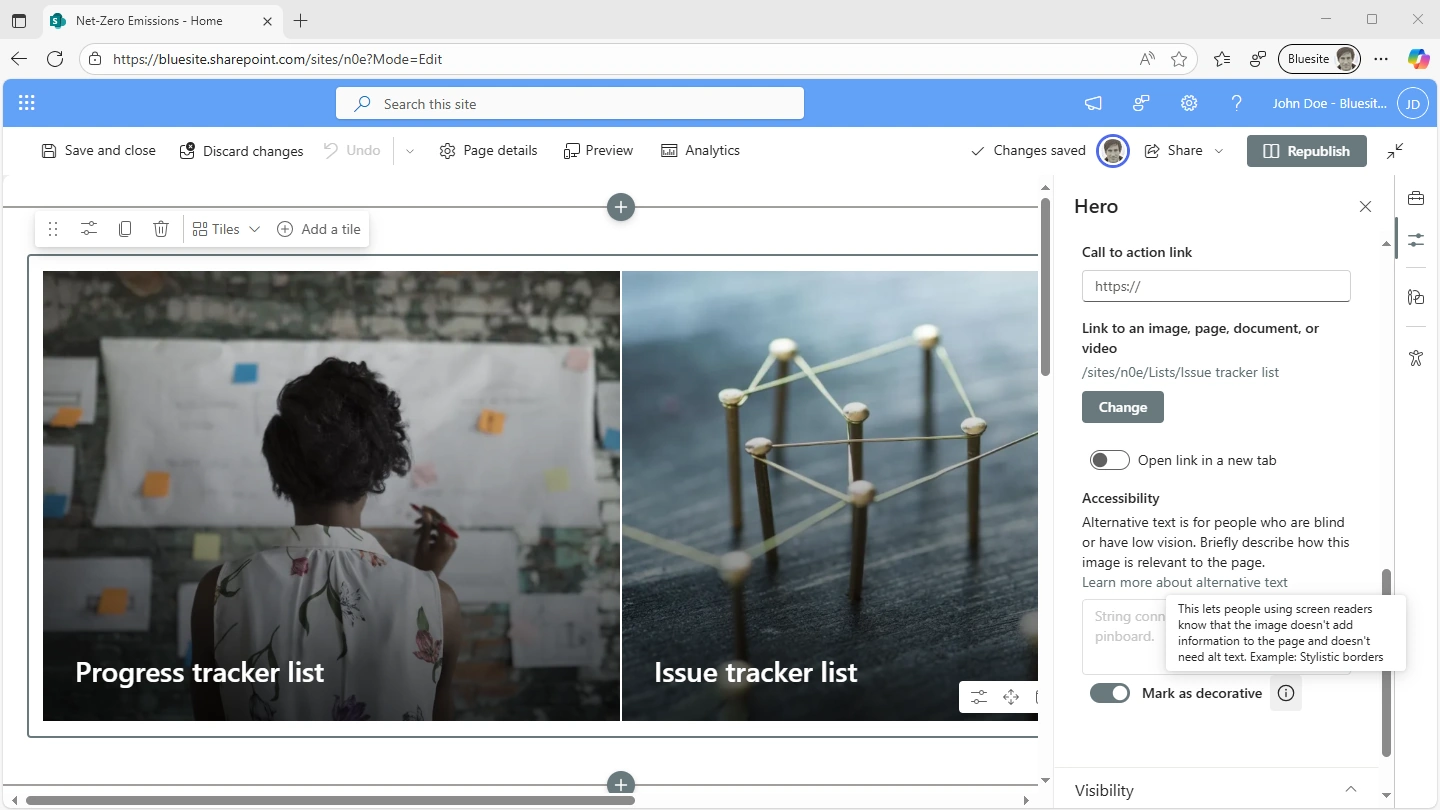
With the “Project management” site template from Microsoft, you add a new homepage (“ProjectHome.aspx”) (you can delete the previous homepage “Home.aspx”). The new homepage features a Hero web part at the top left two-thirds. The left tile shows a woman checking a wall diagram and links to the Progress tracker list. For accessibility, you should mark the image as decorative. The right tile shows a close-up of random pins on a pinboard connected by a wire , linked to the Issue tracker list. This should also be marked as decorative. Neither tile includes a call-to-action link —you can also disable the call-to-action with the slider.
Tip: Add the Progress tracker list and the Issue tracker list as apps to your browser rather than opening them in a new tab
For the documents web part—as on the Hero web part tiles and for project contacts on the right—you should remove the text “[Sample content]”.
![shows “[Sample content]” highlighted in the title of the documents web part and the context menu with the menu item “Cut” highlighted](../screenshots/sharepoint-homepage-edit-documents-web-part-2025-august-1440x810.png)
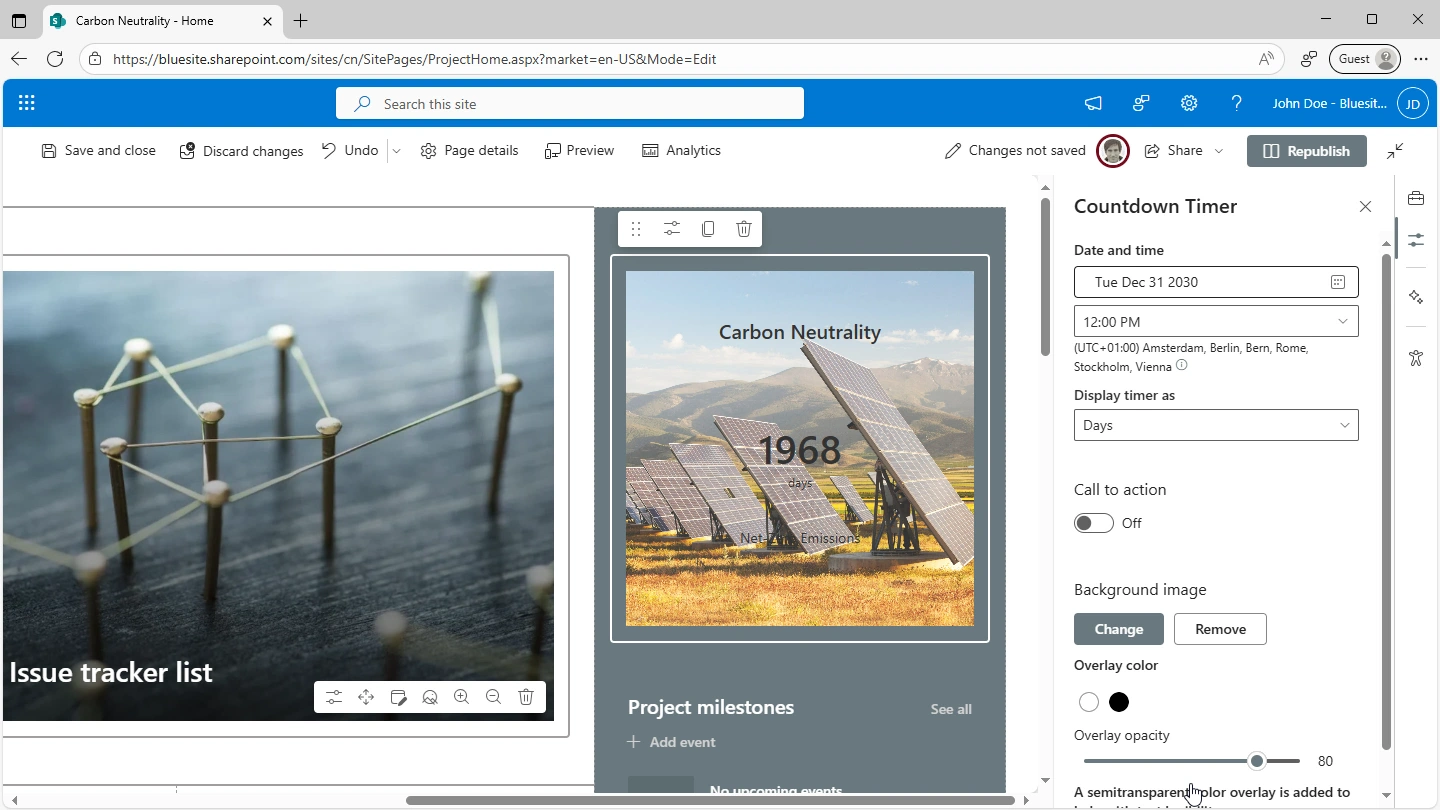
At the top right of the page is a Countdown timer web part. Set the project end time as a date and for “Show time as,” choose “days”—that’s enough for most projects. Choose a suitable background image. Replace the title above and the description below the timer directly in the web part. You can also add a call-to-action link and title to the countdown timer web part if that makes sense to your project.
Below the countdown timer is the “Events” web part with the title “Milestones in projects.” As long as there are no events in the SharePoint event list, the web part will show placeholders.
The Quick Links web part below that, titled “Team tools,” should be revised with resources for your project or deleted. I recommend opening the external resources in a new browser tab.
For project contacts at the bottom right, remove “[Sample content]” from the title and delete the listed people (the people are fictional characters in Microsoft’s sample company “Contoso”). Add the project manager and her deputy.
As already mentioned, the “Events” web part is different from the M365 group calendar. You can add events from the group calendar to the homepage of the project management website using the “Group calendar” web part. In any case, you should clearly communicate the difference between project team events and project milestones!
Page template for the project status report
On the homepage, click “+New” and “Page.” On the left, under “Page templates,” click the “Saved on this site” tab. The “Status report template” is somewhat hidden here. Click “Create page” at the bottom right.
The page template contains web parts for text, images, documents, and links. You can customize the page as needed. After publishing, you can share the page with project stakeholders via a link or email.
First, of course, delete or replace the text above the title “THIS PAGE CONTAINS SAMPLE CONTENT” (“Edit properties”).
The status report template content consists of text web parts, which you can customize as needed. For example, if you add the “List” web part to display current issues, note that the issues in the list may change after you publish your status report. Here are a few tips for the status report:
- Export lists to Excel and insert the list as text in the status report
- Add a compact summary of upcoming milestones with the “Events” web part
- Add news added this month with the “News” web part (filter)
When you “Publish” the status report (top right), you’ll be shown how you can notify others about the report.
If you add the status report page to the navigation, make sure the title is less than 25 characters, so it displays completely. If you want to send the status report to an email address, you can send yourself a test email first.
Conclusion
Using the “Project management” site template you should think about three things.
- Rename navigation link “Project tracker list” to “Progress tracker list”
- Delete the “Home.aspx” page from the Site Pages library, because this page is no longer in use. ProjectHome.aspx is the home page of the website, and new pages will come up in the Site Pages library with every status report you publish.
- Do not confuse the group calendar with the SharePoint event list for project milestones!
If you are working in quality management, find out more about Bluesite Consulting 'Quality management' template for SharePoint Online
Hide the “Project Management” site template
If you don´t like Microsoft's site template in SharePoint Online. You need PowerShell and an account assigned the “SharePoint Administrator” role to hide it. Here’s the PowerShell line of code5
Set-SPOBuiltInSiteTemplateSettings -Identity "f0a3abf4-afe8-4409-b7f3-484113dee93e" -IsHidden $true
FAQ
How do I apply the “Project management” site template to an existing SharePoint team site?
Click “Settings” (top right) and “Apply a site template.” On the “From Microsoft” tab, click “Project Management.” At the bottom right, click “Use template.” Tip: In the “Recently used template” section in the “Site information,” you will find detailed information about the site template used.
How can I use the progress tracker list on my own team site?
You can add the progress tracker list by using the “Work tracker” list template on your team site. On your team site's homepage, click + New, List, and select “Work tracker” from Microsoft’s templates.
How can I use the issue tracker list on my own team site?
You can add the issue tracker list by using the “Issue tracker” list template on your team site. On your team site's homepage, click + New, List, and select “Issue tracker” from Microsoft’s templates.
References
- 1: Project management template (SharePoint Look Book) – Microsoft Adoption
- 2: Use the SharePoint Project management site template - Microsoft Support
- 3: Use the Countdown timer web part - Microsoft Support
- 4: Use a Group calendar in Outlook to schedule and edit events - Microsoft Support
- 5: Set-SPOBuiltInSiteTemplateSettings (Microsoft.Online.SharePoint.PowerShell) | Microsoft Learn